
DIY Picture Framing for Oil Paintings
DIY picture framing is how I frame my own oil paintings at the studio bench. It took a few wonky corners to get there, but it is not difficult once you have the right two or three tools. Here are the tips I wish someone had told me, the kit I use, and a calculator for what the moulding really costs.
Framing is not rocket science
Framing is a skill, not a mystery. Once you have learned it, it is simple – and when you are starting out as an oil painter and want to offer your paintings framed, it saves you a lot of money and a lot of waiting around.
You do not need a workshop on day one. Start with a few hand tools and build the kit up over time. It is a reasonable investment for the early years of your art career, and if your work takes off and you would rather hand the framing to a professional, good tools sell on easily second-hand.
Framing is also an art of its own. The right moulding finishes a painting the way a last glaze does. The tips below are the ones I have collected at my own bench – useful for anyone starting to explore framing.
From my bench
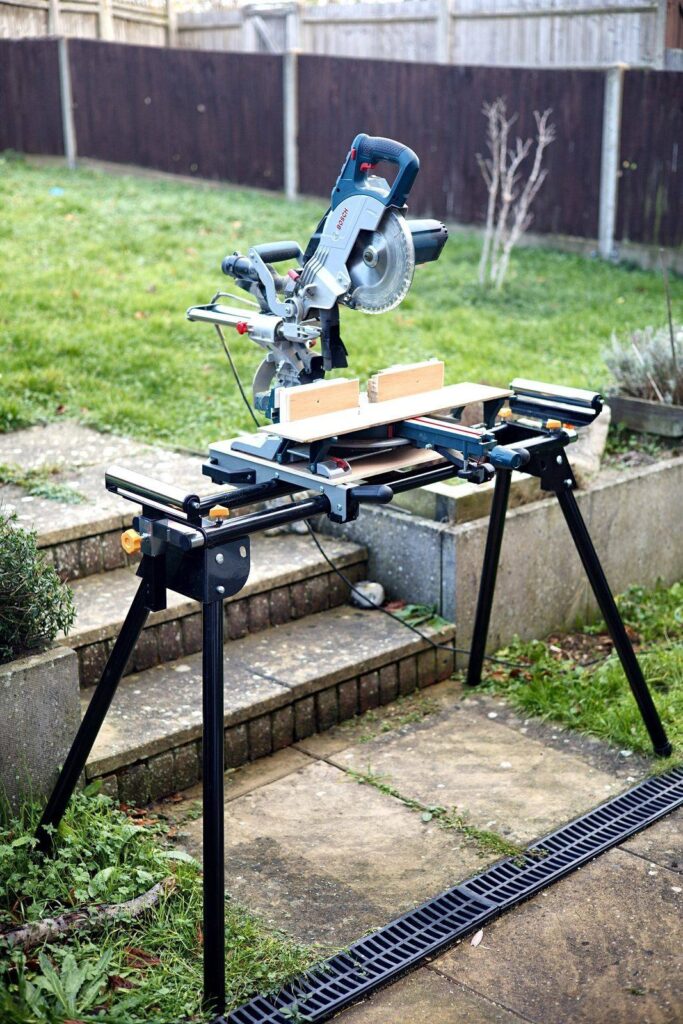
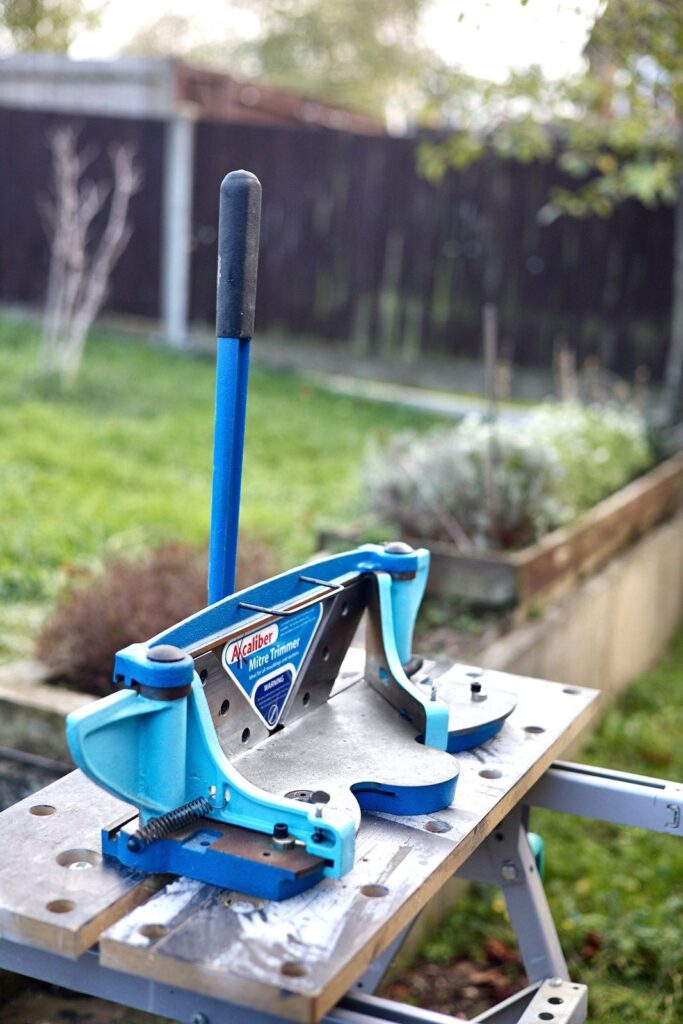
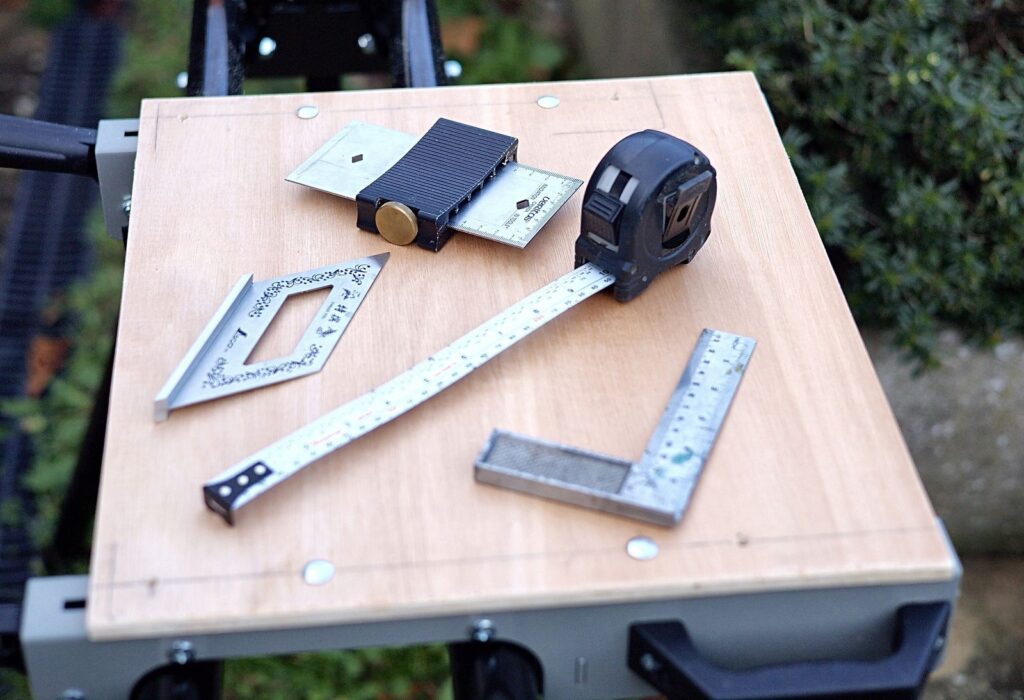
The kit I actually use: a sliding mitre saw on a folding stand, my Axcaliber mitre trimmer, and a folding bench with a plywood top.
This guide is for oil paintings on canvas or panel only: no glass to cut and no mount board, which keeps it simpler and a good deal safer. For drawings and prints, a ready-made frame is usually the sensible choice.
How to measure for a picture frame
Tip 1
Measure the painting, not the label
Canvases are rarely the size printed on them, and rarely perfectly square. Measure both ends of each side and use the bigger figure.
Tip 2
Add a fitting gap
Add about 3 mm to each dimension (1.5 mm a side). Canvas and wood move with the seasons, and a painting forced into a tight frame will bow the corners open.
Tip 3
Think in long points
Each piece is a trapezoid. The long point – the outside edge, tip to tip – is the easiest measurement to mark and check with a tape.
Tip 4
Check the rebate depth before you order
Compare the depth of the step in the moulding with the depth of your canvas. If the canvas is deeper, you will need offset clips – or a deeper moulding.
Tip 5
Opposite sides must match exactly
A millimetre between the two sides of a pair matters more than a millimetre on the overall size. Cut pairs one after the other with the same setting.
Tip 6
Work from one printed cut sheet
Write every length down once and tick each piece as you cut it. The framing calculator prints one for you.
Cutting picture frame moulding
Tip 7
Straight cut first, with 2 cm to spare
Cut each piece square off the long length, about 20 mm over. A short piece is much easier to mitre accurately than a 3 m length waving about.
Tip 8
Then the mitre, 2–3 mm long
Cut both ends at 45°, leaving the piece 2–3 mm too long in total – a little at each end for the trimmer to shave off. Measure along the outside edge.
Tip 9
Tape the cut line
A strip of low-tack tape (I use green FrogTape) over the cut stops the face from chipping. Mark on the tape, cut through it, then peel it off slowly.
Tip 10
Let the teeth enter the face
Breakout happens where the teeth leave the wood. On a chop saw, cut with the face of the moulding up, so any rough edge ends up at the back where nobody sees it.
Tip 11
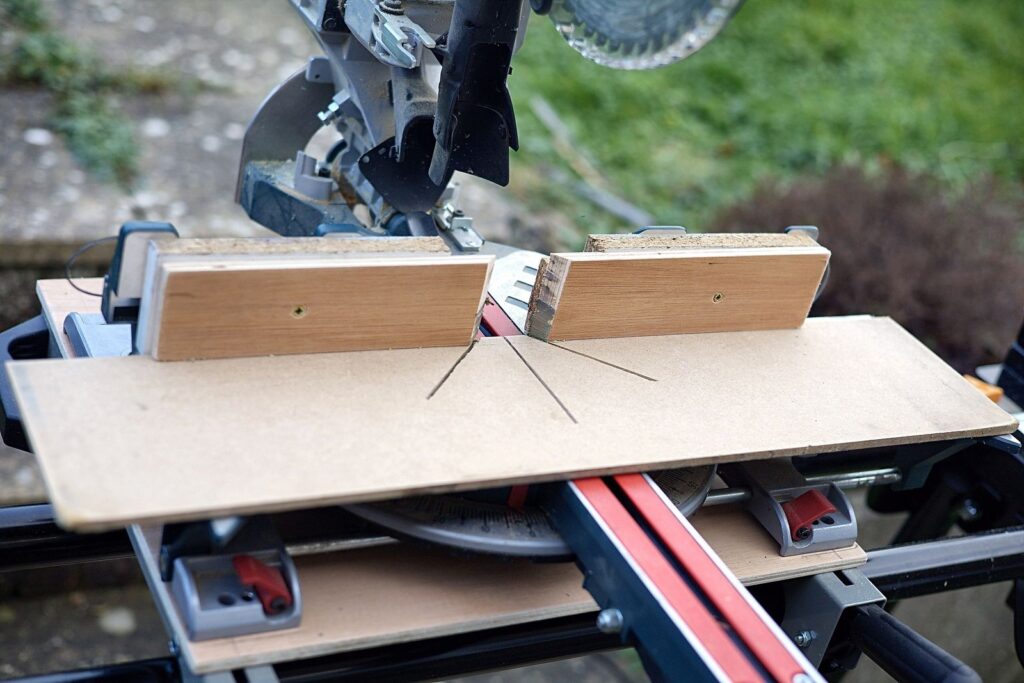
Make a zero-clearance fence
Once you have a mitre saw, screw a strip of MDF or ply to the fence and cut straight through it. The slot shows exactly where the blade lands, and supports the fibres so the cut stays crisp.
Tip 12
Skip the ends of the length
The first few centimetres of a length often get knocked in transit. Start your first cut a little way in.
Tip 13
Test your 45° on scrap
Cut four short offcuts and put them together. Any error in the angle is multiplied by eight round a frame, so a tiny gap here becomes a big gap later.
Tip 14
Let the blade stop
On a power saw, let the blade stop before you lift it. Lifting a spinning blade back through the cut nicks the face.
Tip 15
Use a stop block for repeats
Clamp a block to the saw stand or bench at the right length and every piece in a pair comes out the same.
Trimming the mitres
Tip 16
Trimming is the step that matters
A glass-smooth mitre is what makes a corner close. It is also the step that holds most people back – once your mitres are clean, the rest is easy.
Tip 17
Take thin shavings
Half a millimetre at a time, and a very thin last pass. A heavy cut tears; a thin one leaves the end polished.
Tip 18
Keep the knives sharp
A blunt trimmer crushes instead of slicing. Polcore is kind to the knives; hardwoods are not.
Tip 19
Check pairs back to back
Lay the two sides of a pair together. If they are not identical, trim the longer one until they are.
Tip 20
Why not sand or plane by hand?
I have tried shooting boards and sanding blocks. It is far too easy to round the end over or lose the 45°, and the two sides of a pair never quite match. A trimmer cuts them identically – that is the whole secret.
Gluing and clamping
Tip 21
Dry-fit first
Put the frame together without glue and look at every corner in good light. Fix it now, not when the glue is wet.
Tip 22
The right glue
Wood takes ordinary PVA wood glue, spread thinly on both faces. For Polcore, use the adhesive your supplier recommends for it.
Tip 23
Two Ls, then the frame
Glue two L-shapes and check each corner with a square. Then join the Ls and pull the whole frame together with a strap clamp.
Tip 24
Measure the diagonals
Corner to corner both ways. If the diagonals match, the frame is square. If not, adjust the strap before the glue grabs.
Tip 25
Wipe squeeze-out straight away
A damp cloth on the face before the glue skins. Dried glue on a finished moulding is hard to hide.
Tip 26
Leave it overnight
Then add V-nails or pins at the corners if the frame is large or the painting is heavy.
Tip 27
Hairline gap?
A wax fill stick or touch-up pen in the right colour hides it. Everybody uses them, including the professionals.
Fitting and hanging
Tip 28
Drill pilot holes
A 1.5–2 mm bit for every screw, so the moulding does not split.
Tip 29
Hold the painting gently
Turn buttons or flexible points if the painting sits inside the rebate; offset clips if it stands proud at the back.
Tip 30
D-rings a third of the way down
Cord between them with a little slack. It hangs flatter to the wall than a single hook at the top.
Tip 31
Bumpers on the bottom corners
Two small felt or rubber bumpers keep it straight and let the wall breathe behind it.
Tip 32
Label the back
Title, year, your name and website. It is useful for the owner, and a quiet bit of marketing for you.
Picture framing tools: the kit I use
No workshop needed. The saw stand and the bench fold flat, so everything packs away after a framing session. Second-hand tools are absolutely fine – a good trimmer or saw lasts for decades. Just check the blades are sharp and the fence is square.
| Tool | What I use | What to look for |
|---|---|---|
| Mitre saw | Bosch Professional GCM 8 SJL, 216 mm sliding mitre saw | Any 210–255 mm compound mitre saw. It doesn’t need to slide – sliding is a bonus for wider mouldings. Search “compound mitre saw”; second-hand is fine. |
| Mitre saw stand | Titan mitre saw stand (Screwfix) | “Folding mitre saw stand” with roller supports and a stop. |
| Mitre trimmer | Axcaliber MT1 (Axminster) | The Rider mitre trimmer is the current equivalent; used Lion or Orteguil trimmers are good buys. Search “mitre trimmer guillotine”. |
| Framing table | WORX Pegasus folding bench with a loose sheet of plywood laid on top | Any folding clamp workbench. The plywood just sits on top, so it lifts off when you need the clamps. |
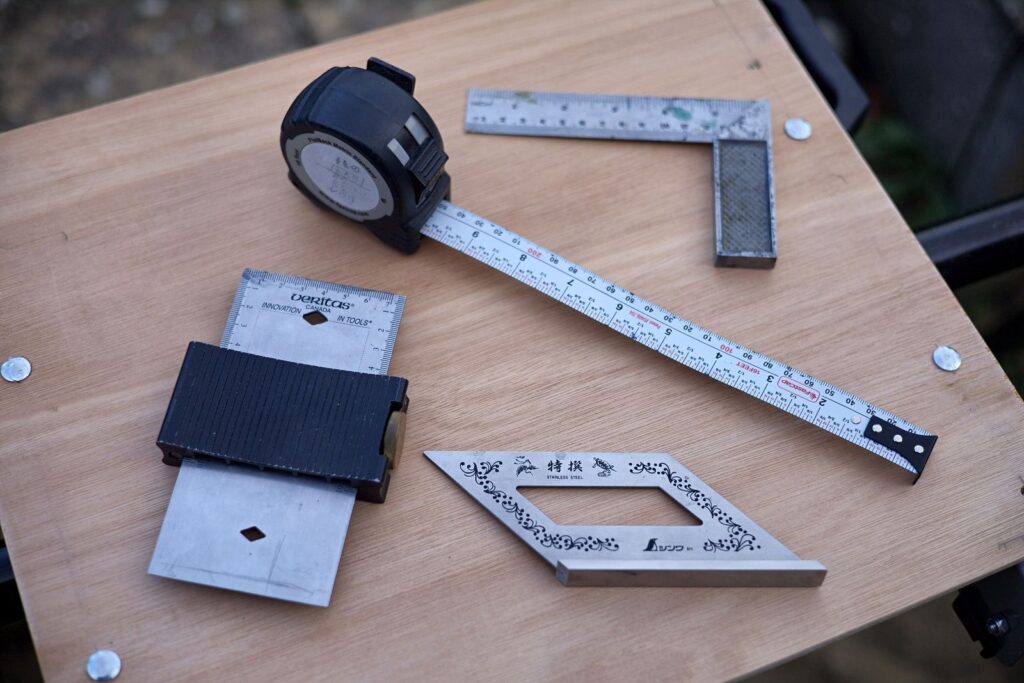
| 45° mitre square | Shinwa mitre square | Search “45 degree mitre square” – plenty on AliExpress and Temu for a few pounds. |
| Repeat measurements | Veritas Sliding Square (Axminster) | Search “sliding square” – the blade locks at a set length, so every piece in a pair is marked the same. The diamond cut-out holds a pencil for lines parallel to an edge. |
| Tape measure and try square | Nothing special | Any decent ones. AliExpress and Temu are fine for these. |
| Clamps | Strap clamp and corner clamps | Search “picture frame strap clamp” and “90 degree corner clamp”. |
Coming soon: photos of the corner clamps, combination square and vernier calliper.
Essential · from about £400
The mitre trimmer kit
For framing your own body of work. The trimmer is the one tool you can’t skip: it shaves both pieces of a pair exactly the same, and that is what makes a corner close. By hand it is far too easy to lose the 45°.
- Compound mitre saw for the straight cuts and the rough mitres – it doesn’t need to slide.
- Mitre trimmer (guillotine) – I use the Axcaliber MT1 from Axminster.
- Folding workbench with a loose sheet of plywood on top as the framing table – I use a WORX Pegasus.
- Tape measure, try square, 45° mitre square, strap clamp, corner clamps, glue, wax fill sticks.
Pro · £500 and up
Speed and volume
For batches, bigger work or framing for others. Buy second-hand if you can.
- Sliding mitre saw for wider mouldings – mine is a Bosch Professional GCM 8 SJL (216 mm). The trimmer still does the finishing.
- Mitre saw stand with roller supports and a stop for repeat cuts – mine is a Titan stand from Screwfix (about £35).
- Zero-clearance fence screwed to the saw – see Tip 11.
- Morso foot-operated guillotine – the big beast of framing workshops. Worth it if you have the space.
- V-nailer or underpinner – only if you frame in volume.
Buying picture frame moulding
Tip 33
Know the minimum order
Mainline Mouldings has a £50 + VAT minimum for courier delivery, and delivery is £16 to the UK mainland (free over £120); its lengths are 2.9 m. Lion has no minimum on the UK mainland, but delivery is £12.50 (free over £195). Check both at checkout – terms change.
Tip 34
Frame in batches
A minimum order is easier to reach, and much better value, if you frame four or five paintings at once rather than one.
Tip 35
Plan around the length
Every piece needs its 2 cm spare plus a saw cut. A 2.9 m length often fits one frame of about 50 × 40 cm, with an offcut to spare. The calculator below works it out.
Tip 36
Polcore or wood?
Polcore is light, consistent and cuts cleanly and is kind to blades – ideal to start with. Wood is stronger for big, heavy work and can be waxed or stained to match.
Tip 37
Keep the offcuts
Anything over about 40 cm makes a small frame or a test corner. The short bits are perfect for checking your saw is still at 45°.
Tip 38
One moulding, many paintings
Picking one or two house mouldings makes a body of work look like it belongs together – and makes every order simpler.
Safety, briefly
Tip 39
Clamp the work
Never hold a short piece by hand near a blade. Clamp it, or use a longer piece and cut it down later.
Tip 40
Eyes and ears
Safety glasses with any power saw, and ear defenders if you are cutting a batch.
Worth looking up on YouTube
- Setting a mitre saw to a true 45°.
- Making a zero-clearance fence or insert.
- Using a stop block for repeat cuts.
- Gluing and clamping frame corners.
- Sharpening the knives on a mitre trimmer.
Picture frame cost calculator
Put in your painting size, the moulding price and how many frames you want. It tells you how many lengths to buy, what is left over, how the minimum order works out, and how it compares with a framer's quote.
All figures are approximate – a rough idea of what a frame costs before you commit. Suppliers’ prices and delivery can change.
